Once a predefined user view is selected, the User can further filter the cases they see based on which workspace they want to view, the action date, priority, and additional advanced filters.
- Select the desired filter(s) from the available options.
- Click the Filter button to apply your selections. The filtered results will then be displayed in the Unibox.
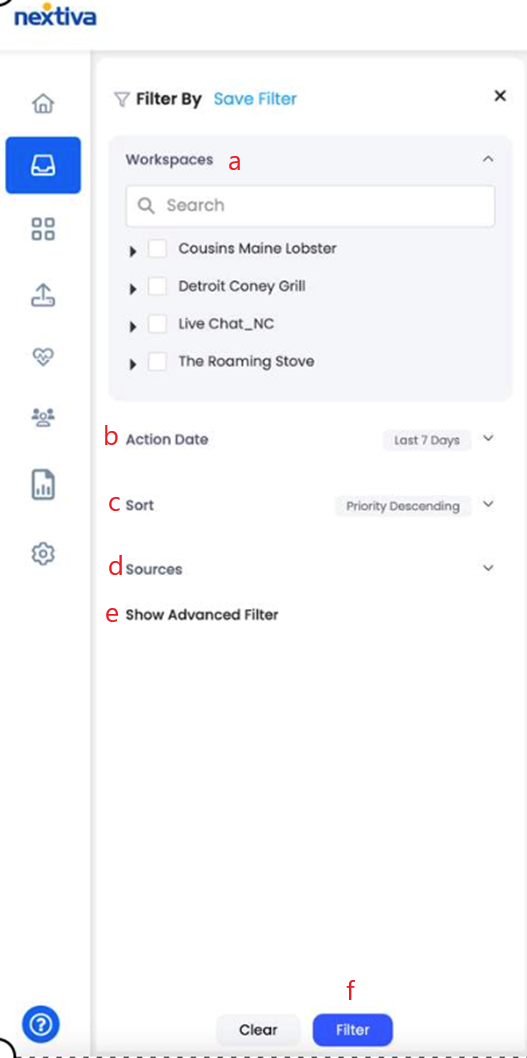 |
- Workspaces: See interactions from specific workspaces you have access to. This helps you focus on relevant customer conversations.
- Action Date: Filter interactions based on when they were last updated, acted upon, or had a new message created. This lets you prioritize recent or overdue conversations.
- Sort: Arrange your interactions by priority, case creation date, case action date, or other criteria to suit your workflow.
- Sources: Filter by the channel the interaction originated from (e.g., Facebook, email, live chat).
- Advanced Filter: Access a wide range of additional filters to precisely target the interactions you want to see.
|